Hey oqtane cumminity, In this blog, I’m going to show you a way to create a simple hero section for your home page in Oqtane. The hero section is that large, eye-catching area of your website that grabs people’s interest as quickly as they come to your web page.
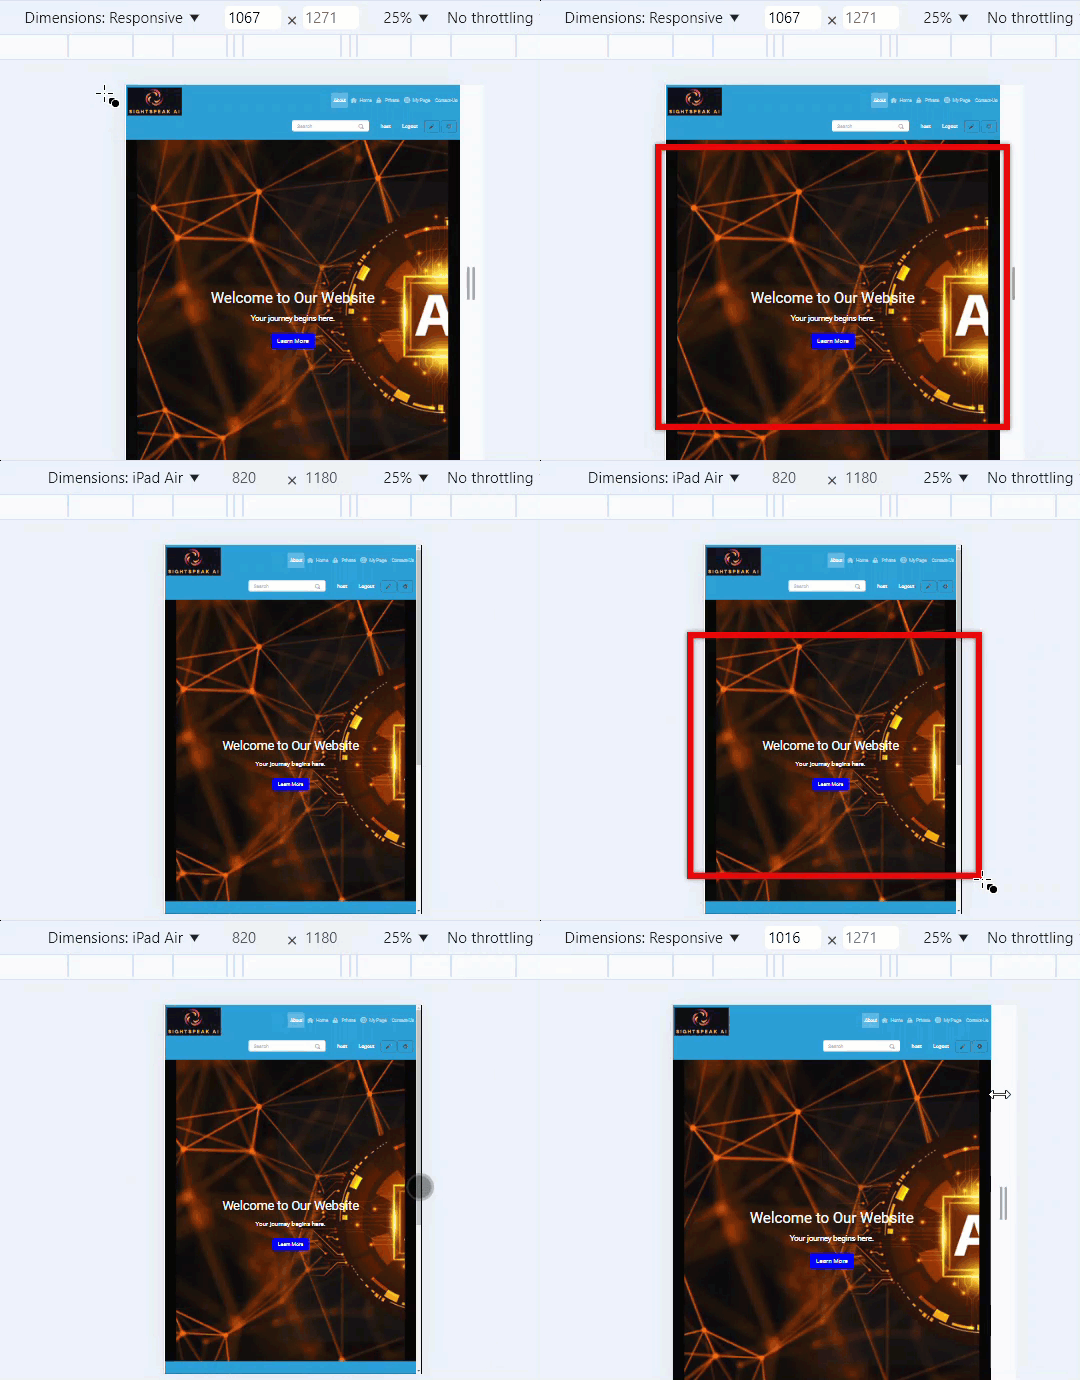
Final Look: This is the final looks of hero section.

Final looks in all devices mobile & ipad:

I’ve got a simple code snippet that will help you set up your hero section quick and easily. Let’s explore in! To create a hero section for your Oqtane home page, you can use the following simple code snippet:
Step 1: Open Your Oqtane Site
First, make sure you've got your Oqtane site open and ready. If you’re not sure the way to get started with Oqtane, I’ve covered that in a previous blog. But for now, let's focus on the hero section.
Step 2: Add the Text/HTML Module: To create the hero section, we’ll use the Text/HTML module in Oqtane. Here’s how you may upload it:
- Go to your home page in Oqtane.
- Click at the “Add Module” button.
- Select “Text/HTML” from the listing.
This module will allow us to add custom HTML and CSS to design the hero section.
Step 3: Insert the Hero Section Code
Now, it’s time to add the code. Here’s a simple snippet you can use:
<link rel="stylesheet" type="text/css" href="http://Your/Style.css">
<div class="hero-section">
    <h1>Welcome to Our Website</h1>
    <p>Your journey begins here.</p>
    <a href="#" class="hero-btn">Learn More</a>
</div>
"First, let's start by adding the basic HTML structure for our hero section. We’ll create a div with the class hero-section. Inside this div, we have a heading, a paragraph, and a call-to-action button." Here, the h1 tag is used for our main heading, which says, 'Welcome to Our Website'. The p tag contains a short message: 'Your journey begins here.' And finally, we have an a tag styled as a button that says 'Learn More.' This button can be linked to any page you want your visitors to explore.
"Next, we'll link our external CSS file to style the hero section. This is done using the <link> tag in your HTML file’s head section. Make sure to replace the href value with the path to your CSS file."
Step 4: Customize the Design: You can customise the text content, colors, and style to match your brand. "Now, let’s move on to the CSS. The .hero-section class is the main container for our hero content.
/* Hero Section */
.hero-section {
    background-image: url('http://localhost:44357/files/Hero-sec-img.png');
    background-size: cover;
    background-position: center;
    padding: 50px 20px;
    text-align: center;
    color: white;
    display: flex;
    flex-direction: column;
    align-items: center;
    justify-content: center;
    height: 100vh;
}

.hero-section h1 {
    font-size: 3rem;
    margin-bottom: 20px;
}

.hero-section p {
    font-size: 1.5rem;
    margin-bottom: 30px;
}

.hero-btn {
    background-color: rgb(255, 238, 0);
    padding: 10px 20px;
    color: white;
    text-decoration: none;
    border-radius: 5px;
    font-size: 1.25rem;
    transition: background-color 0.3s ease;
}

.hero-btn:hover {
    background-color: darkblue;
}

/* Responsive looks for all device */
@media (max-width: 992px) {
    .hero-section h1 {
        font-size: 2.5rem;
    }

    .hero-section p {
        font-size: 1.25rem;
    }

    .hero-btn {
        font-size: 1rem;
        padding: 8px 18px;
    }
}

@media (max-width: 768px) {
    .hero-section {
        padding: 30px 15px;
        height: auto;
    }

    .hero-section h1 {
        font-size: 2rem;
    }

    .hero-section p {
        font-size: 1rem;
    }

    .hero-btn {
        font-size: 0.875rem;
        padding: 6px 15px;
    }
}
Explaining style:
We’ve set a background image to make the section visually appealing. The properties background-size: cover; and background-position: center; ensure the image covers the entire section and is centered."
"I’ve also added padding: 50px 20px; to give some space around the content. text-align: center; centers the text, and color: white; makes the text stand out against the background. The display is set to flex, with flex-direction: column;, align-items: center;, and justify-content: center; to perfectly center all the elements vertically and horizontally."
CSS for h1, p, and .hero-btn. : "Now, let's style the text and the button. The h1 tag’s font size is set to 3rem to make the heading large and prominent. The paragraph’s font size is set to 1.5rem for a balanced look below the heading. Both have some margin to create spacing between the elements."
CSS for .hero-btn. : "For the button, we’ve used a bright yellow background to grab attention. The button has padding for spacing, white text for contrast, and rounded corners using border-radius: 5px;. We've also added a transition effect on hover, which changes the background color to dark blue, making it interactive and engaging."
media queries : To ensure our hero section looks good on all devices, we’ve added media queries. The first media query adjusts the font sizes and button padding for screens smaller than 992px, making everything slightly smaller. The second media query kicks in for screens smaller than 768px, further reducing the font sizes and padding, and adjusting the section height for smaller devices.
This code snippet creates a visually appealing hero phase that’s responsive, that means it adjusts smoothly throughout exceptional display screen sizes. You can effortlessly customize the colours, fonts, and different styles to fit your website online’s branding!
Step 5: Save and Publish: Once you’ve made your changes, save the module, and your hero section will appear on your home page. Don’t forget to preview it to make sure everything looks good before publishing.
And there you have it! A simple hero section for your Oqtane home page. With just a few lines of code, you can create a stunning first impression for your visitors. Feel free to play around with the design and make it your own.
If you have any questions or want to look more tutorials like this, let me know. Access Oqtane playlist Thank for reading our blogs, Stay tuned for such interesting blogs in future with SightSpeak AI.